To use a handheld sewing machine, identify its model and stitch type, follow its diagram to set up and thread it, then test on matching scrap. Guide fabric without tugging and finish the thread as the manual directs. Compact machines do not all work alike.
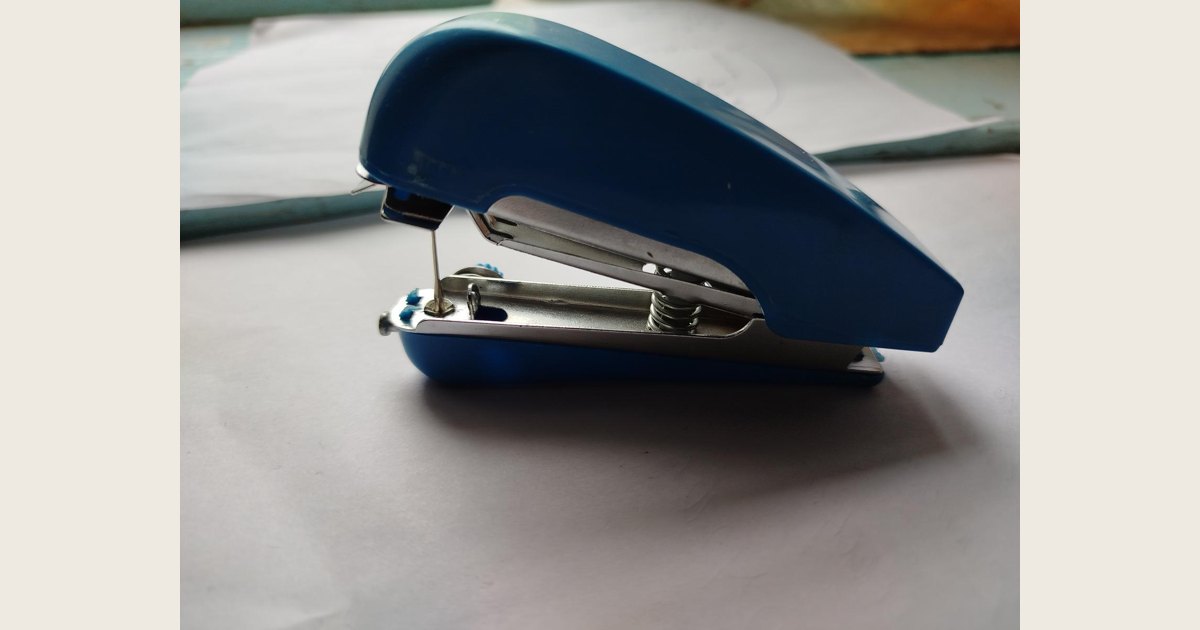
Cover image: Photo: Compact hand sewing machine Mini in Tashkent Region by Sevayuu, https://commons.wikimedia.org/w/index.php?curid=149108979; https://creativecommons.org/licenses/by/4.0/. Resized and padded. Illustrative stock photo; no product testing is implied. The pictured compact machine is illustrative and is not either Singer model discussed.
A handheld sewing machine can help with a short, accessible repair, but thread paths and finishes depend on the model. Find the make and model label and its matching instructions first; if they are missing or do not match the machine, stop rather than guess.
For example, Singer describes its Stitch Sew Quick as a single-thread handheld mending machine for quick repairs and basting that works best on lightweight fabrics. Its Stitch Quick + has two-thread capability and can be used handheld or on a tabletop. Those differences are specific to these models, but they show why an exact model manual matters. Singer’s Stitch Sew Quick listing · Stitch Quick + listing.
The short version
- Start with the manual or diagram for your exact machine; if yours is unbranded or lacks instructions, do not copy a similar-looking model’s threading path.
- With the power off, use only the specified power source, needle, and thread arrangement.
- Follow the threading diagram, then test on matching scrap without pulling the fabric.
- Finish as the manual directs. If the sample skips, bunches, jams, or loosens, stop and troubleshoot before repairing the item.
Use the manual’s diagram rather than a generic picture or video for threading: similar-looking handheld machines can use different stitch systems.
Know what your handheld machine is designed to do
A handheld sewing machine (also called a portable or mini mending machine) is best treated as a purpose-built tool for a limited job: a short repair or a bit of basting where bringing fabric to a full-size machine is awkward. Features vary by model. For example, Singer markets its single-thread Stitch Sew Quick for quick repairs and basting and says it works best on lightweight fabrics; that is guidance for that model, not a universal fabric rating. Singer’s product details are a reminder to check the material guidance for your exact handheld sewing machine.
Use it for a short, accessible repair only when the fabric feeds smoothly in a test. Thick seam allowances, jeans hems, bulky quilt edges, elastic knits, and intersecting layers may stall; stop if you need to force fabric. For a long, durable, or load-bearing seam, hand stitching or a full-size machine may be a better choice. See our guide to hemming with a sewing machine for a conventional-machine option. Our explanation of how a sewing machine works describes conventional-machine mechanics; it is not the threading route for this handheld model.
A quick model comparison
| Model | Verified features | What still requires the exact instructions |
|---|---|---|
| Singer Stitch Sew Quick | Battery-powered and cordless, with a single-thread feed; Singer says it works best on lightweight fabrics. | The exact thread path and knotting method shown in its manual. |
| Singer Stitch Quick + | Two-thread stitching; handheld or tabletop use; four AA batteries required, with cord power also offered. | Its model-specific thread route, fabric guidance, and seam finish. |
Singer lists batteries as not included for both models. These details apply only to these products; use the exact model’s instructions for power, threading, and finishing rather than borrowing settings from another compact machine. Stitch Sew Quick details · Stitch Quick + details
For a hands-on example, the next steps follow the single-thread Singer Stitch Sew Quick. Gather a matching fabric scrap, thread, scissors, and the power source specified in its manual. Open the official English instruction manual from Singer’s manual library, compare its parts diagram to the machine, and keep it open. The Stitch Quick + is a different model; do not transfer the steps below to it.
Set up and thread the machine step by step
1. Prepare the machine with power off
Before loading batteries, threading, or placing fabric, switch the machine off. Use a clear, well-lit surface and check the needle and working area for loose thread or damage. On the Stitch Sew Quick, the manual says to move the needle only with its rotating dial—not by pushing or pulling the needle arm. Keep fingers away from the sharp needle; if fabric catches, turn the machine off and follow the exact manual’s removal instructions. (Stitch Sew Quick manual.) If your own model has a different control, use its instructions.
2. Install the specified power source
Use the battery type, number, and orientation shown by the maker. If the model supports a cord, use its approved power arrangement. The Stitch Quick +, for example, requires four AA batteries and offers cord power; those details are model-specific. Singer Stitch Quick +
Close the compartment and keep the switch off while you thread.
3. Thread the Singer Stitch Sew Quick: a worked example
These steps summarize the single-thread Stitch Sew Quick manual’s “Threading” section and Figures 10–12. Keep the manual open beside the machine, match its parts diagram to your device, and leave the power off. The manual cautions users to move the needle with its rotating dial, not by pushing or pulling the needle arm.
- Check that the bobbin spring is in place. The manual shows thread coming from the bobbin’s or cone’s upper-right side.
- Pass the thread upward through the guide hole shown in Figure 10.
- Route it between the two silver tension-control discs in Figure 11.
- Insert the needle threader through the needle’s eye from front to back. Put the thread through the threader’s eyelet, then draw the threader back through the needle eye from back to front and remove it.
- Leave at least 5 cm of thread through the needle before sewing.
This is a model-specific example, not a universal handheld-machine path. If your parts or model label differ, do not adapt these steps; locate instructions for your exact machine. Singer Stitch Sew Quick instruction manual, “Threading” and “Instructions for Use,” Figures 10–12. (Singer lists the manual in its support library.) Safety note: the needle is sharp. Keep fingers clear, turn the power off before threading or handling a jam, and use the dial as the manual directs.
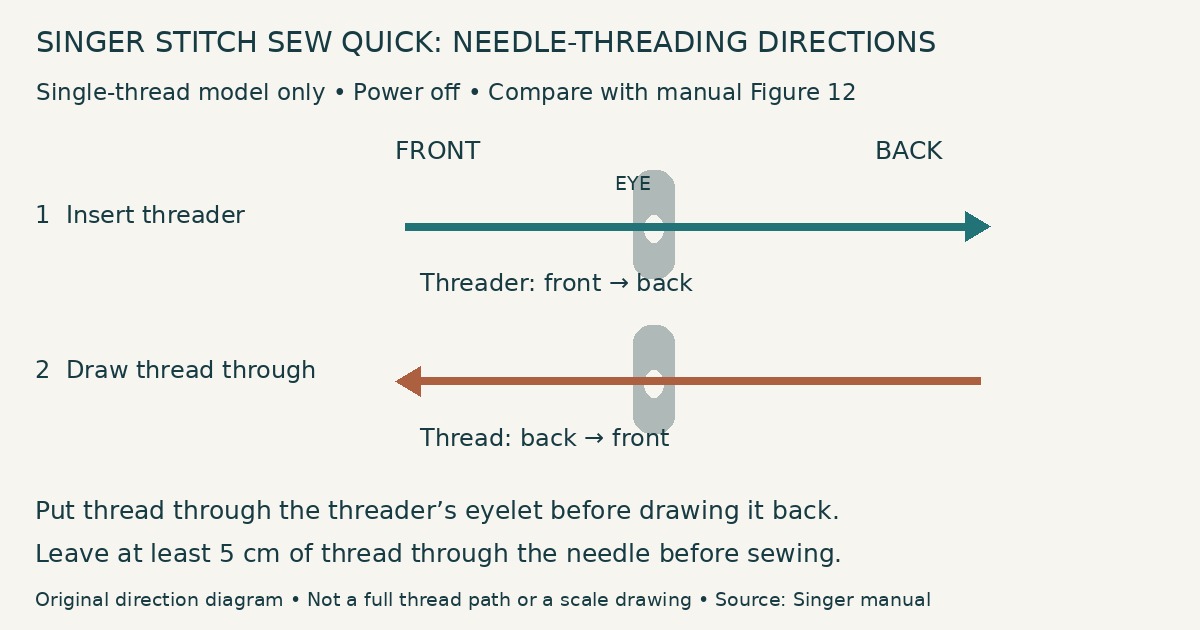
Original direction diagram by Sprout and Spool, CC BY 4.0 (https://creativecommons.org/licenses/by/4.0/), based on the Singer Stitch Sew Quick manual’s threading instructions and Figure 12. Arrows show travel through the needle eye; this is not a complete thread path, a scale drawing, or product testing.
4. Load a scrap and test the stitch
The Stitch Sew Quick manual directs the user to switch off, turn the dial until the needle is at its highest position, lift the fixing plate without pressing the needle arm, place fabric beneath the plate, and release it. Use a scrap with the same fabric and number of layers as the repair.
The manual’s handling example holds the device in the right hand and uses the left hand to guide fabric direction and speed. Slide its switch forward to sew, feed at a controlled pace, and use the fixing plate’s middle line as a straight-seam guide. Do not yank the fabric. Switch off before checking the test for skipped stitches, bunching, or broken thread. These details apply to the Stitch Sew Quick only; they are Singer’s written directions, not a claim of product testing.
A clean test on thin scrap does not prove that a thick garment seam will work. If the sample jams or needs force, stop and choose another method.
5. Finish and knot this model’s single-thread seam
The Stitch Sew Quick manual describes the following sequence in “To End Sewing” and “Knotting the Thread,” Figures 5–9. Switch off before handling the fabric, and use the manual’s illustrations as you work:
- Turn the dial to raise the needle fully. Use the back of a seam ripper or scissors to draw out about 7.5 cm of thread, as Figure 5 shows.
- Turn the dial to lower the needle into the fabric, then continue until it returns to its highest position.
- Lift the fixing plate and move the fabric left. Do not pull so hard that the thread comes out of the seam.
- Turn the fabric over. Slide the threader down through the last stitch, then feed about 2.5 cm of thread from top to bottom as Figures 6–7 show.
- Pass the thread through the loop and tighten the knot (Figure 8). Slowly withdraw the threader down the stitch and trim the excess (Figure 9).
The official Singer manual illustrates the last-stitch loop; keep it open beside these instructions. Gently check the test seam before using the machine on the actual item. This knotting method is for the single-thread Stitch Sew Quick only; do not assume the two-thread Stitch Quick + ends the same way.
Troubleshooting before the real repair
Stop, reset, and test again rather than pressing harder on the switch.
Nothing happens when you switch it on. Check the switch and the specified battery or power setup.
The thread is uneven, catches, bunches, or breaks. Switch off, remove loose thread, and rethread from the first guide. Check the needle and every guide against the diagram, then make a new test seam.
The fabric stalls. Reassess the repair. Flatten the test sample and reduce bulk only if that still represents the actual repair; otherwise use a different method.
The seam comes apart. Re-read the manual’s stopping and securing steps, then test the finish again before repairing the item.
Frequently asked questions
Can a handheld sewing machine sew denim or several layers?
Do not assume it can. Manufacturer guidance varies, and Singer says its single-thread Stitch Sew Quick works best on lightweight fabrics. Singer Stitch Sew Quick Check your exact model’s instructions, then test only on matching scrap. If the fabric will not feed smoothly without force, switch methods.
Why can’t I use one online threading video for every handheld mender?
Thread arrangement and stitch construction can differ. Singer’s two current examples are explicitly described as single-thread and two-thread machines, respectively. Stitch Sew Quick Stitch Quick + Use a video only if it names and shows your exact model, and compare it with the manufacturer’s written diagram.
What is the most important step for a cleaner repair?
Make the test seam first. It lets you confirm the thread path, handling, fabric suitability, and finishing method before the machine touches a visible garment, curtain, or other item.
The practical takeaway
A handheld sewing machine works best when you treat it as a model-specific mending tool: match the manual, thread every guide in sequence, test on similar fabric, guide rather than pull, and secure the ending according to the stated procedure. If the test does not sew cleanly or the repair is thick, long, or load-bearing, choose a full-size machine or another repair method instead.